Creating a Music Store
An important step in setting up your Uniti Core – the music store is where your rips and downloads will live.
To start your music store setup, go to the ‘Settings’ menu and select ‘Manage Music’, followed by ‘Configure music stores’ and then ‘Configure new music store’. Uniti Core will then search for all the possible locations (on both locally attached storage and on network attached storage) that could be used for storing audio files.
For an internal drive or a locally attached USB device, you will need to format the device before it can be used. Formatting will remove any existing data on the drive, so be sure that if there is any data left, you have either copied it elsewhere or you no longer need it.
If you are using a USB attached storage device, you can select the format that you wish to use on that device – this enables you to unplug the device and use it with your computer if you wish to transfer music from your computer directly into the downloads folder on the storage device. If you are a Windows user you should choose NTFS, if you are a Mac user you should choose HFS+ and if you are a LINUX user you should choose EXT4. Uniti Core will automatically decide the format of any internal drive and NAS shares do not need to be formatted by Uniti Core.
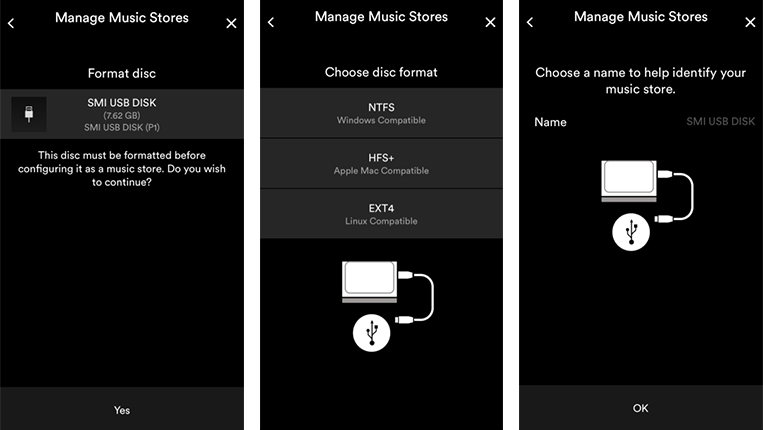
You will be prompted to enter a name for the drive before formatting – this is for your reference, should you have multiple devices as stores. Once you have entered your desired name, touch ‘Done’ and then ‘OK’ to begin formatting the device. Your drive will then be formatted and all existing data erased. Once formatting is complete, the device is available for use as music storage by Uniti Core.
Playing Music from Uniti Core
Uniti Core can operate as a UPnP™ music server, providing audio files to any UPnP-compatible player on the same network - and it couldn't be easier to do. It also incorporates a digital audio output to allow local playback via the digital input of a hi-fi system. Music can be played locally from internal storage, a network drive or attached USB drives using the Naim app.
Creating a Playlist
Building playlists couldn’t be easier and makes accessing music to suit your mood a one-stop shop. Start populating yours with our simple guide below:
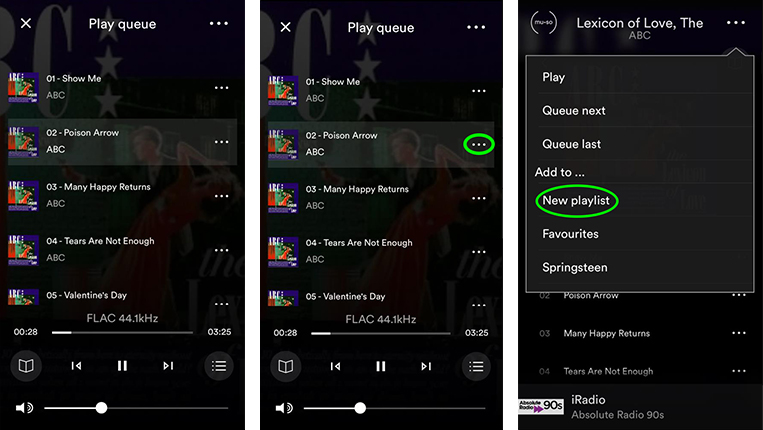
Open the Naim app and touch the Uniti Core icon. Navigate to the track you wish to add, for example - touch ‘Album’ and then find your desired album. Touch the ‘…’ icon next to the track you wish to add. Before you can add your track to a playlist you will need to create the playlist, so touch ‘New playlist’. Touch the ‘Name’ text area in the bar that appears and enter a name for your playlist using the keyboard. Then touch ‘Done’ and your track will have been added to the new playlist. If you'd like to add more tracks, touch the ‘…’ icon next to each track you want to add and then touch the playlist you wish to add it to from the menu that pops up, it should appear just below the ‘New playlist’ option. To view your playlists, touch the home button - the house icon and then go to the ‘Playlists’ option and then the desired playlist to see a list of all the tracks within.


